Tuesday, February 7, 2012

Straw Bale Garden 2011 - Planting

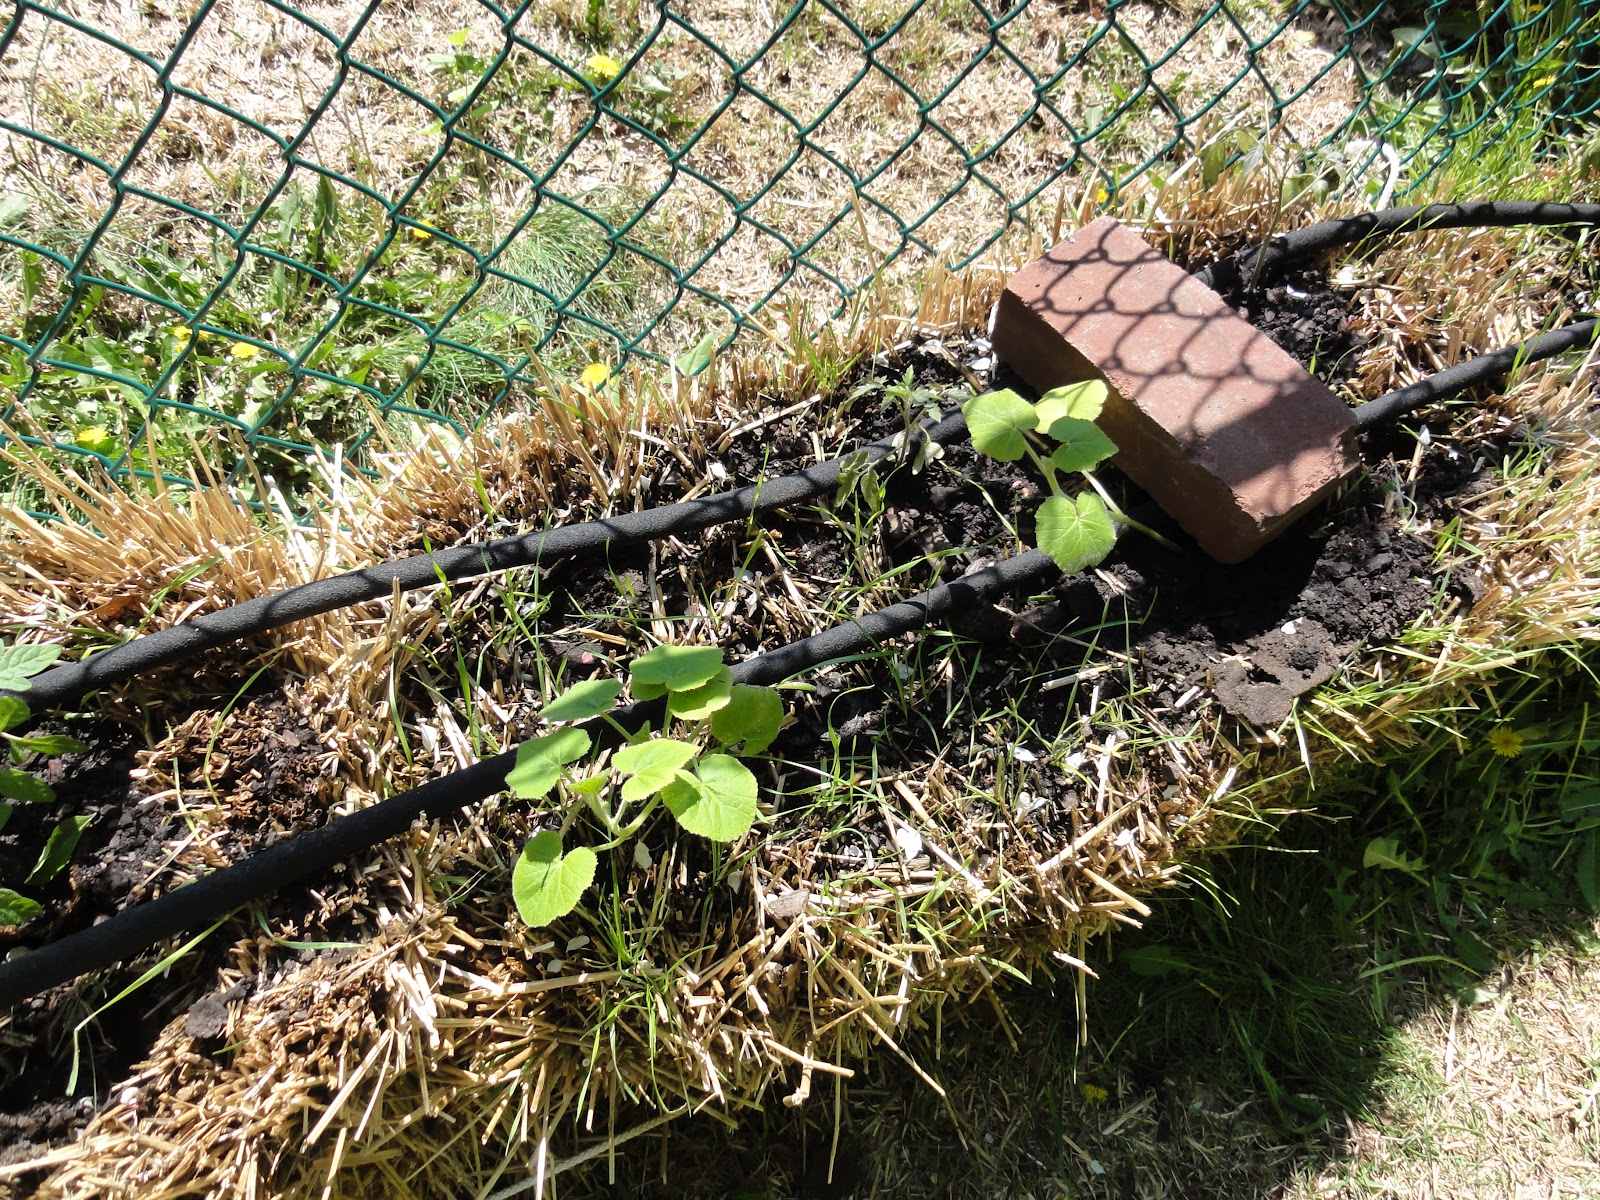
I found these pictures that I forgot that I had taken of Straw Bale Garden 2011 just after planting. Descriptions of each follow each picture, click the shots to enlarge.  Note the soaker-hose held in place by bricks, which worked well.  There are also metal staple-like stakes holding it periodically that are harder to see.  The grass you see sprouting from the bales is actually wheat straw and was easily plucked out where needed.

Above is planted squash pumpkin and honey boat squash along with tomatoes and a lone cucumber plant I believe (it didn't survive).  The pumpkin squash from this bale took over half the backyard eventually.


Next bale over shows the doomed cucumber plant along with more tomatoes.  I planted too many tomatoes too close together and they kind of overgrew and choked each other out later in the summer. They all produced well for a while though.


More squash and/or cucumbers.  These didn't do well as they were badly shaded by the tomatoes that grew all over the fence.


Final bale along the back fence.  More tomatoes and squash or cucumbers.  Again, shading took its toll on the vines here.  The tomatoes actually would have been fine had I left them at what you see here, but it looked so sparse that I added seedlings from the nursery to fill in the perceived gaps - Big Mistake!


Corner bale had black cherry tomatoes that did very well from being on the end and summer squash that grew twisted and yielded one viable fruit.  There are also pumpkin and honey boat squash in here that went crazy, taking over the entire area up to the neighbor's property.


Eggplant bale - only two plants ended up surviving, the rest were eaten by something, possibly slugs or maybe a brave rabbit (Disco Stu was constantly on the prowl).


Wax beans in desperate need of fertilizer.  The slugs loved eating these too, but they actually rebounded quite nicely to yield many meals worth of beans all summer.


Peppers from Home Depot.  One mislabeled as a hot chile (really long, green, and not hot at all), the other correctly labeled as ornamental thai hot peppers that were excellent and very hot indeed.


Mesclun salad blend just starting to sprout.  These worked great as I plucked them regularly to thin them and got some great salads out of this bale.  Replanted the bale later with seeds I got at a flea market that were a year old and barely sprouted anything.  Remember: always go with new seeds if you didn't store them yourself.


Final bale with a couple of squash plants that did ok (farthest uphill, this bale was difficult to keep wet). Also a six-pack of what Home Depot had labeled as bell peppers but ended up being cherry hot peppers. Lesson learned: NEVER TRUST THE LABELS AT HOME DEPOT!!!

How did this get in here?  No, we would never brainwash a baby...
Yes, this is Vivienne at 6 months old in Daddy's old Michigan hoodie.  It only fit for about a week but I wanted you to see that I save it still Mom and Dad.  Go Blue!

Monday, February 6, 2012

Tutorial: Straw Bale Gardening I - Getting Started

Nick dotes on his seedlings
The first step in creating a straw bale garden should be performed by early February at the latest: Making the decision on whether to start from seed or from seedlings purchased from a nursery.  If you read my seed post you will know that I sit right on the fence on this topic.  There is a certain pride with growing your own from seed, and a larger variety of vegetables to choose from.  On the other hand, growing from seed requires a large-ish time investment, and unless you are a professional you probably won't end up with seedlings that look half as nice as what the nursery is offering.  If you choose to go the nursery started route you can afford to go straight to the garden design and set-up.  If you want to grow from seed I recommend ordering either online or from seed catalogs as I have had poor luck with seeds bought in nurseries and other stores.


Getting the actual garden starts with choosing a spot and obtaining/placing the bales.  Choose the spot for your garden wisely.  Observe closely what areas get at least 8 hours of continuous sunlight.  Don't forget that it may be winter when you are making these observations, and the path of the sun will probably change quite a bit north come late-spring and summer when the growing goes on.  This can make a big difference in the hours of sunlight an area receives.  Also realize that any overhanging trees, or tall neighboring trees, will have leaves on them, giving more shade than you might realize.  I note these cautions from experience, as Straw-Bale Garden 2011 might have been more successful had I placed it better.

Hauling the bales into position

Next find a local farmer with some straw bales for sale.  Any kind will do I think; I used wheat straw last year.  I heeded the cautions of many online "experts" and did not look towards hay.  I think that I agree with the assessment that the hay would just sprout a lot more seed and need more maintenance, though it would no doubt also offer more natural composting fertilizer to the plants.

Anyways, find bales to buy.  I used Craigslist to find a local selling some for $2.50 apiece in 2011 which was a very good price.  I managed to fit 10 bales total in my SUV, brought them home and proceeded to place them and begin the conditioning process.  Be sure to place the bales right where you want them as they will be too heavy to move once they are wet.

Lucas working in the garden, spreading soil on top of the bales
The bales can be placed on their sides (string down) or with the straw sticking up and down (string around). If you lay them on their sides they should retain water better, though the string will rot on the underside unless it is made of some type of plastic.  Up and down aligns all of the straws to draw water straight down and through but keeps the bales in better shape.  I put mine up and down and to overcome the water problem we watered soil and composted manure down into the bales as we prepped them.

Finis
Lucas giving the bales a good soaking
This gardening stuff is fun!
Our cat, "Disco Stu" comes to investigate
Prepared bale
Bales prepared for seeds
If you follow our set-up procedure, when you are done you should have something like this (left).  It takes several applications of soil and soakings to achieve this as the soil will continue to disappear down into the bale.  After soil remains on top continue to water the bales for 2-3 weeks, enough to keep them nice and wet.  Some say that this is enough to start the composting process by itself. but I recommend treating each bale with a healthy dose of high-nitrogen fertilizer at around 3 weeks to jump-start the process.  I used blood meal last year and it seemed to do fine.  Inorganic fertilizer might work even better.  Then just keep the bales wet some more and you should be able to detect a rise in their core temperatures using a meat thermometer.  Note when the bales peak and begin to cool, then one more week and they should be ready to plant in.  Throughout this don't let them dry out.

If you plan to plant seeds directly, you will need to add a 1-2" layer of soil on top to sow the seeds in (see right).  I did this for salad greens, just sprinkling them on top and it really worked well.  Later I tried some melon seeds which I just covered with a bit of soil and they all germinated fine too.  Planting seedlings is as easy as choosing a suitable instrument and carving holes to accommodate the seedlings with root ball and planting the seedlings directly in the holes.

Extra Recommendations:

  1. Set up a soaker-hose system for watering before you plant.  Wrap the hose in whatever manner achieves good coverage and stake it down.  It will be much harder to do this after planting, trust me.
  2. Invest in a timer for your soaker-hose.  The water bill can get out of hand if you forget to turn it off (again, trust me) though it doesn't hurt the garden any.
  3. I used slow-release Miracle-Gro pellet fertilizer made for house plants on the top of my bales last year after tiring of fertilizing with a watering can.  They seemed to work great.
So there you have it.  Put in a little effort up front and you can have a self-sustaining garden for the entire summer.  I know this post is titled "Getting Started", but there isn't much more you need to do after getting the plants in the bales beyond normal maintenance.  Weeds didn't become an issue last year until late in the season, and then the pulled out without any real effort.  Watch out for slugs, bugs, mold, rot, signs of under-fertilization or burning, and most importantly - keep the garden watered.  Then sit back and have your mind blown by what can grow from a bale of straw.

Next up: Pictures of Straw Bale Garden 2011 in full swing, so stay tuned.

Cheers.


Saturday, February 4, 2012

A Little Background


My Wonderful Family
(Note: This is actually my first post for the blog, but it ended up on top after I finished playing/learning with draft mode.  Can't figure out how to move it back down -  here it stays.)


This is a log of my experience growing a garden in my backyard. Let me state this up front: THIS IS NOT IN MY NATURE. I am not a gardener. I don’t like getting down and dirty digging in the earth. I abhor weeding of any kind. I work 5 days a week as an analytical chemist, have almost an hour commute each direction, am the proud father of two delightful children ages 5 and 1, and my wife works insane hours as a medical resident.

In short: I don’t have time for this.

But I am a foodie and I love to cook almost as much as I love to eat. I have subscriptions to not one, but two cooking magazines which I read for the articles while barely ever having time to try out the recipes. Yet I try to cook most days out of the week, to feed both myself and my family filled with extremely picky eaters (except the youngest, bless her heart she seems to actually take after Dad). I frequent farmers’ markets for quality ingredients grown close to home for the simple reason that the quality is so much better than what you find in the giant supermarkets.

Let’s be clear though. I am not some naturalist, nor hippie/granola type. I do not worry overly much about organic this or heirloom that, though I do understand and appreciate the difference in quality, taste, and nutritional value that properly sourced food can provide. I love to harvest. The picking/cooking/eating is the part I am in this for, and I am not against using slow-release fertilizer pellets to ensure that the harvest will be bountiful. If you are looking for pure-organic gardening instruction there are plenty of other sources available on the interwebs.

I grew up with my mother’s garden providing a small bounty of fresh foods every summer, a garden that I had to help maintain (read: weed) regularly. That same wonderful woman also found time to cook great food for a family of 5 literally every night while working full-time as a high school teacher. What I remembered about her garden though was that it seemed like a lot of work for relatively little reward. Whether it was the limited space, time, soil quality, gardening experience, or no doubt a combination of all of these things – let’s just say that I can’t recall harvesting much beyond the tomatoes (which were plentiful and delicious and dutifully canned every fall for a winter’s worth of homemade spaghetti sauce - yum).

So growing up, backyard gardening seemed like a bad idea. That was my firm opinion until I met my wife, and more importantly, my in-laws. Gardening
View Of Fleuren House From Back Garden
doesn’t even begin to describe what my in-laws do; it is more a form of art. Just the trek from their house, past the barn (advantage: country living), and through their meticulously placed flower and shrubbery to the vegetable garden was a whole new experience for this city kid. Then being able to take a basket with and literally harvest dinner was life-altering. The resulting dinner was not fancy, but was none-the-less outstanding as the freshness of the food jumped and danced on the palette. I wanted this in my backyard too, but I am far too lazy to do what they do (read again: weed) like they do. It just seemed like I would never have what I wanted: Fresh vegetables picked and carried directly to my kitchen for immediate consumption without weeding, getting dirty, and the constant attention gardening requires.

Then last winter I finally caved. I wanted my own garden so bad that I began looking into raised-bed gardening. I am also cheap though, so I was busy trying to figure out what inexpensive material I could line my raised-beds with when I stumbled upon the answer to my ultimate dilemma: Straw Bales.
Prepared Bales (Soil Optional)

It turned out that some people on the interwebs insisted that using a frame of straw bales to surround a raised bed of garden soil was inexpensive and worked very well. Intrigued by this I entered it into Youtube and what I saw literally blew my mind. People were planting right into bales of straw with great results. Best of all, this kind of gardening required no soil, could be fully automated (with a little ingenuity), and best of all: almost no weeding. It seemed too good to be true, so I tried it. The results were eye-opening to say the least.

Thursday, February 2, 2012

Straw Bale Garden 2012 Layout

After a ridiculous effort, finally I have managed to post this image depicting the planned layout for Straw Bale Garden 2012. This schematic will be referred back to often when describing the goings-on in the garden as it takes shape and (hopefully) flourishes. Note that despite my best efforts, the upper portion was cut off. You'll just have to imagine that there is space above the 26-30 bale compost areas, around 3-4' before the yard is engulfed by a poison ivy-ridden hedge. Oh yeah, and up is north.

This marks the last time I try to convert an Excel file into a usable image to upload to this space. No details, but seriously - what a nightmare.


Tuesday, January 31, 2012

SEED ORDERING TIME!!!!!

Squash from Straw Bale Garden 2011

(Abundant Life Seeds)

So this year I was fairly sure that I would be going with Abundant Life Seeds again after the great performance of their product last year. That is, of course, after I decided to go the seed route again at all. I had initially made up my mind – or so I thought – to go strictly with seedlings bought from local nurseries, both to make life easier and to ensure a healthy start to Straw Bale Garden 2012. Then the seed catalogs arrived en masse in my mailbox in early January and such thoughts were quickly put aside. Such vibrant bounty of vegetable loveliness jumping off the pages… I was hooked again!

I was slightly taken aback by the arrival of two new catalogs that I have no recollection of contacting or soliciting before. It is scary how personal information makes its way around to people you don’t even know exist, you know? If I had dealt with any of the seed companies electronically last year it would be one thing, but all dealings were done via snail-mail and yet, here were two new additions begging for my business unsolicited. Needless to say, these companies will not be getting any publicity in this space.

The other two catalogs were again Abundant Life Seeds and Burpee. I put Burpee aside and immediately began planning what I would order from Abundant Life… but it was boring. While last year everything was new to me, this year’s catalog didn’t have much different to excite my senses. I didn’t want to redo what had already been done, I knew that much. I can vouch for Abundant Life Seeds: their seeds are fantastic. Their variety is lacking though, as can only be expected from the “little guys” of the seed world.

So I found myself being more and more drawn into the bright, flashy catalog from Burpee, and what I found was that there was a lot more there then I remembered seeing available on the Burpee display at Home Depot. The variety was almost endless. Oh, and they offered perks like free organic fertilizer for orders over $30 and FREE SHIPPING! (Yay!) for orders over $50. I knew from last year that my order would easily exceed these marks, so… Burpee won me over. Is this the dark side? I guess we’ll find out.

Can't be pure evil, can they?

Leaving the details of each variety for a future post, here is the basic plan for growing from seeds this year:

· Lots of Arugula – Fell in love with this stuff from last year’s Mesclun Blend

· Salad Mix – Not the same Mesclun Blend, but something similar

· Mustard Tendergreens – Late season, something not addressed last year as the “greens” bales went to seed

· Green Beans and Wax Beans – Did I mention this year’s garden is going to be bigger? Twice as big + actually!

· Cherry Tomatoes – 2 different varieties, 1 yellow, 1 red

· Microgreens – Sounds cool, huh? Much more on this later.

· Cucumbers – Some to grow over the fence, in the old compost from 2011; Some “Spacemaster” to try from a fresh bale

· Broccoli Raab – Really loved this stuff when we were members of a CSA 2 years ago

· Spinach – My loving wife Andrea insisted (and I love it too of course)

· Edamame – See “Spinach”

· Sugar Snap Peas – Last year’s were an afterthought, put in a planter that was too small and disappointed. The few that we got though were heaven!

· Sweet Peppers – Mislabeled seedlings from Home Depot last year were the biggest disappointment of the garden. Going to do it right and start my own this time!

· Patty Pan Squash – Another request from Andrea, these will also go into the compost from 2011.

Flesh the above out with Musque de Provence pumpkin squash seeds harvested from last year and several tomato seedlings from the nursery (both to go in the 2011 compost) and there you have it! Tune in later for more details and eventually a schematic of the final garden plan.

Monday, January 30, 2012

April Flowers


So, as I mentioned before, everything was going according to plan. The straw bales had been purchased and placed with care (more on this topic later). The seeds had likewise been purchased and started indoors. Though I couldn't necessarily tell what was what, (Rule#1 for next year: Carefully Mark Everything!), it was evident right away that my choice of medium (peat puck starter kit), location (giant, south-facing window), and seed source (Abundant Life Seeds) was a great combination for rapid and healthy growth. By around 2-3 weeks after sowing the seeds I noted the following:

Thriving (to put it mildly):

  • All varieties of squash – can’t tell them apart (some summer squash, some pumpkin squash, some winter squash)
  • Wax beans – only one variety, plants look great
  • Japanese eggplant – 8 seedlings total sprouted, 4 are looking particularly vigorous

Not-So-Thriving:

  • Tomatoes – can’t tell these apart either (black cherry tomatoes, kellogg’s breakfast beefsteaks)
  • Cucumbers – could be some of them are mixed in with the squash (and therefore doing well) but I don’t think so...

So pretty much all seeds sprouted, but not all plants are doing great. My mother-in-law suggests fertilizing to help the tomatoes, so I plan to first transplant the seedlings into peat-pots (small planters that will be transplanted directly into the bales) and then fertilize with Miracle-Gro tomato fertilizer. I bought 36 peat-pots, had Lucas fill them 2/3 full each with a 50/50 mix of potting soil and composted manure, and then had to decide which seedlings made the cut.

The wax beans were easy. I had planned on having 18 plants in the garden so the 18 best looking moved on with only 5-6 missing the cut. The eggplants were straightforward as well. 4 of the 8 seedlings looked much better than the rest, so on they went. The cucumbers weren't hard to choose in the end either, as only two surviving seedlings could be positively identified by their remaining seed casings and therefore both went on to stage 2.

The squash and tomatoes presented a different problem in that I didn’t know which was which. I decided to go with 7 pots for tomatoes and 7 for squash, selecting only based on how healthy the plants appeared to be. This offered no guarantee that I would get a least one of each variety that I planned on, but what else could I do at this point? Live and learn for next year.

Cherry or beefsteak? Who knows?

After fertilizing, all plants did very well in their new pots – too well as it turns out. We have all heard the saying:

“April Showers Bring May Flowers”

Well as it turned out, my over-enthusiasm to get my garden started had brought on a very real problem: April Flowers.

All of the beans, most of the squash, and even a couple of the tomatoes and eggplant had started to flower. I knew instinctively that this couldn’t be good. Flowering is an essential step in a plant’s bearing fruit, but it also takes a considerable amount of energy from the plant. This energy loss could minimize the overall output for the plant once transplanted to the outside, even causing death from the shock of transplanting. And here it was, only the first week of April.

So I had a choice to make: Transplant early and risk a frost killing all (Beginning of May is considered safe where I live) or wait it out and risk having nothing left worth transplanting. I decided to wait as long as I could.

(Rule#2 for next year: Sow no seeds before the 3rd week of March!)

Tuesday, January 24, 2012

Seeds or Seedlings?


Before jumping right into the results of last year’s straw-bale garden, it might be better to start at the beginning. My research into the subject led me to believe that the easiest and most efficient way to start the garden would be by transplanting seedlings. The general consensus went something like this:

  1. Condition the bales.
  2. Make rough holes and drop in seedlings.
  3. ????
  4. Profit.

There wasn’t a lot of internet video showing step 3 (which, it turns out, is 90% watering and waiting and 10% learning the hard way what not to do), but there was plenty enough footage of steps 1, 2, and 4 so I jumped in with enthusiastically with both feet. I figured there were two obvious routes to obtaining seedlings: buy them from a nursery or grow them myself from seed. I decided (initially at least) to go with door number 2 for several reasons, chief among them:

  • This was designed to be a project to do with my son, Lucas, and growing from seed just seemed like much more of a learning experience.
  • I wanted to grow things that were out-of-the-norm and my limited experience with store-bought seedlings was that they were very ordinary plants.
  • I thought it might be cheaper (turns out: not so much really).
  • It was the middle of winter, I was all enthusiastic, and no stores would be selling seedlings for at least another 2+ months.

So I took the plunge and ordered 2 seed catalogs: Burpee (the Wal-Mart of seed retailers) and Abundant Life Seeds (ALS, Organic this, heirloom that, etc.). Within a couple of weeks both showed up in my mailbox and I set to work deciding what to order. Lucas tried to keep his attention on the project at hand, but being only 4 he was not really too involved. Comparing the two catalogs was like night vs. day; Burpee was all glossy with pictures of literally everything, having no shame in touting their amazing hybrids while ALS emphasized their love for everything natural and sustainable right down to the recycled paper it was printed on. Both had similar prices, with ALS being perhaps slightly lower. I didn’t want to order from both (twice the shipping cost), so in the end I decided to give the little guys a chance and went with Abundant Life Seeds.

I ordered lots of stuff: tomatoes and cherry tomatoes, mini cucumbers, Japanese eggplant, wax beans, salad greens, lettuce, pumpkin squash, summer squash, other squash, and others I can’t recall just now. It really added up in price, but all told I have spent more in one trip to the farmers’ market. The seeds arrived in the mail a couple of weeks later, about mid-February, and off I went to Home Depot to get a seed starting kit. The kit consisted of a thin plastic tray with many depressions in it, a bundle of what looked like little hockey pucks, and a lid to keep in heat and moisture.

I wasted no time in getting my seeds going. First I spread the pucks around the tray in the ready-made depressions, and then soaked them with water as per the directions. Each puck eventually grew into a sodden wad of peat, wrapped in a thin mesh with a spot on top to put the seeds. They really worked as advertised too, just put the seed(s) on top of each wad, cover, and place in front of a south-facing window. Within days sprouts were appearing everywhere. Then I realize my first big problem:

I don’t know which are which.

In my enthusiastic push to get started I had neglected to mark what seeds went where. Some were easy (the beans still had a great big bean shell to identify them). Telling which squash was what was an exercise in futility however, a problem that would magnify itself later. At the time though I was elated. Things were growing under my watch. Thriving even! And in recognition of Abundant Life Seeds – at least 95% (est.) of their product sprouted, a pretty good rate by any standard.


Things continued swimmingly for a while. That is until my second big problem emerged…