 |
| Thor the Dog looks on as the soaker-hose is placed |
It is time to start building this year's garden.
On Saturday I went out to a farm north of York with my neighbor's F-150 to purchase 20 straw bales. I found the bales advertised on Craigslist for $3.50 each, a bit more than the $2.50 apiece I paid last year. They were worth the extra price though, because this year's bales are at least 6-8" longer than last year's, affording more space for planting. For those of you following along, 20 bales placed on their ends happen to fill the bed of an early-90's F-150 perfectly, so that no straps were even needed to hold them in for the ride home.
After placing the bales initially in the exact configuration I had previously
planned, I decided to change to 4 beds with 5 bales each to better accommodate the layout of the soaker-hose. The bales were placed with care to keep them lined up evenly and pushed together as snugly as possible. I used whatever bagged soil I had left over from last year to spread on top of the bales, followed by a layer of coffee grounds from a big bag I got from Starbucks. Then it was off to the stores to get supplies.
 |
| Vivienne plays with Stu the Cat while Thor and Zoe keep watch |
I purchased 6 bags (0.75 ft^3) of potting soil and 2 bags of Humus/Composted Manure (bigger, not sure how big exactly) and spread 1 bag of potting soil evenly on each bed followed by 1 bag of the Humus/Composted Manure spread over all beds. This seemed to achieve the desired ~1" thick layer atop each bale that will gradually wash into the straw, allowing for better water retention. The black on top of the bales will also warm the bales more from the sun, theoretically hastening the composting process. Once the topping of the bales was complete, it was time to place the soaker-hose. The remaining bags of soil and Humus/Composted Manure will be used later to top bales for direct sowing of seeds.
 |
| Lucas helping out with the placement of the soaker-hose |
After trying several layouts, I settled on a pattern of weaving the hose back and forth along the length of each bale, taking care to keep the hose centered on each bale for optimal soaking. I purchased 2 additional 50' soaker-hoses to go with the 1 50' hose from last year's garden. The hoses are wound up when you buy them, so I recommend using bricks or something similar to hold the hose in the desired pattern and leaving overnight to "train" the hose into the shape you want. Once the hose will retain its desired shape, use tent stakes, landscaping staples, or something similar to hold the hose down on the bales.
 |
| Staking down the hose with landscaping staples |
 |
| Some bales have their hose doubled-up for x-tra water |
It is important to plan carefully how you want the soaker-hose placed before planting, as it is difficult to move the hoses after the plants are in place and doing so creates a high risk for damaging your seedlings. For my layout I made sure that the bales closest to the fence had more watering potential by doubling up the hose across these bales (see left). I know from my plans that these bales will have plants that need extra water, like tomatoes, and so I planned ahead. This will go a long way towards making my garden automated, and requiring much less of my daily attention.
 |
| Our rabbit-defense system tries out a new perch |
 |
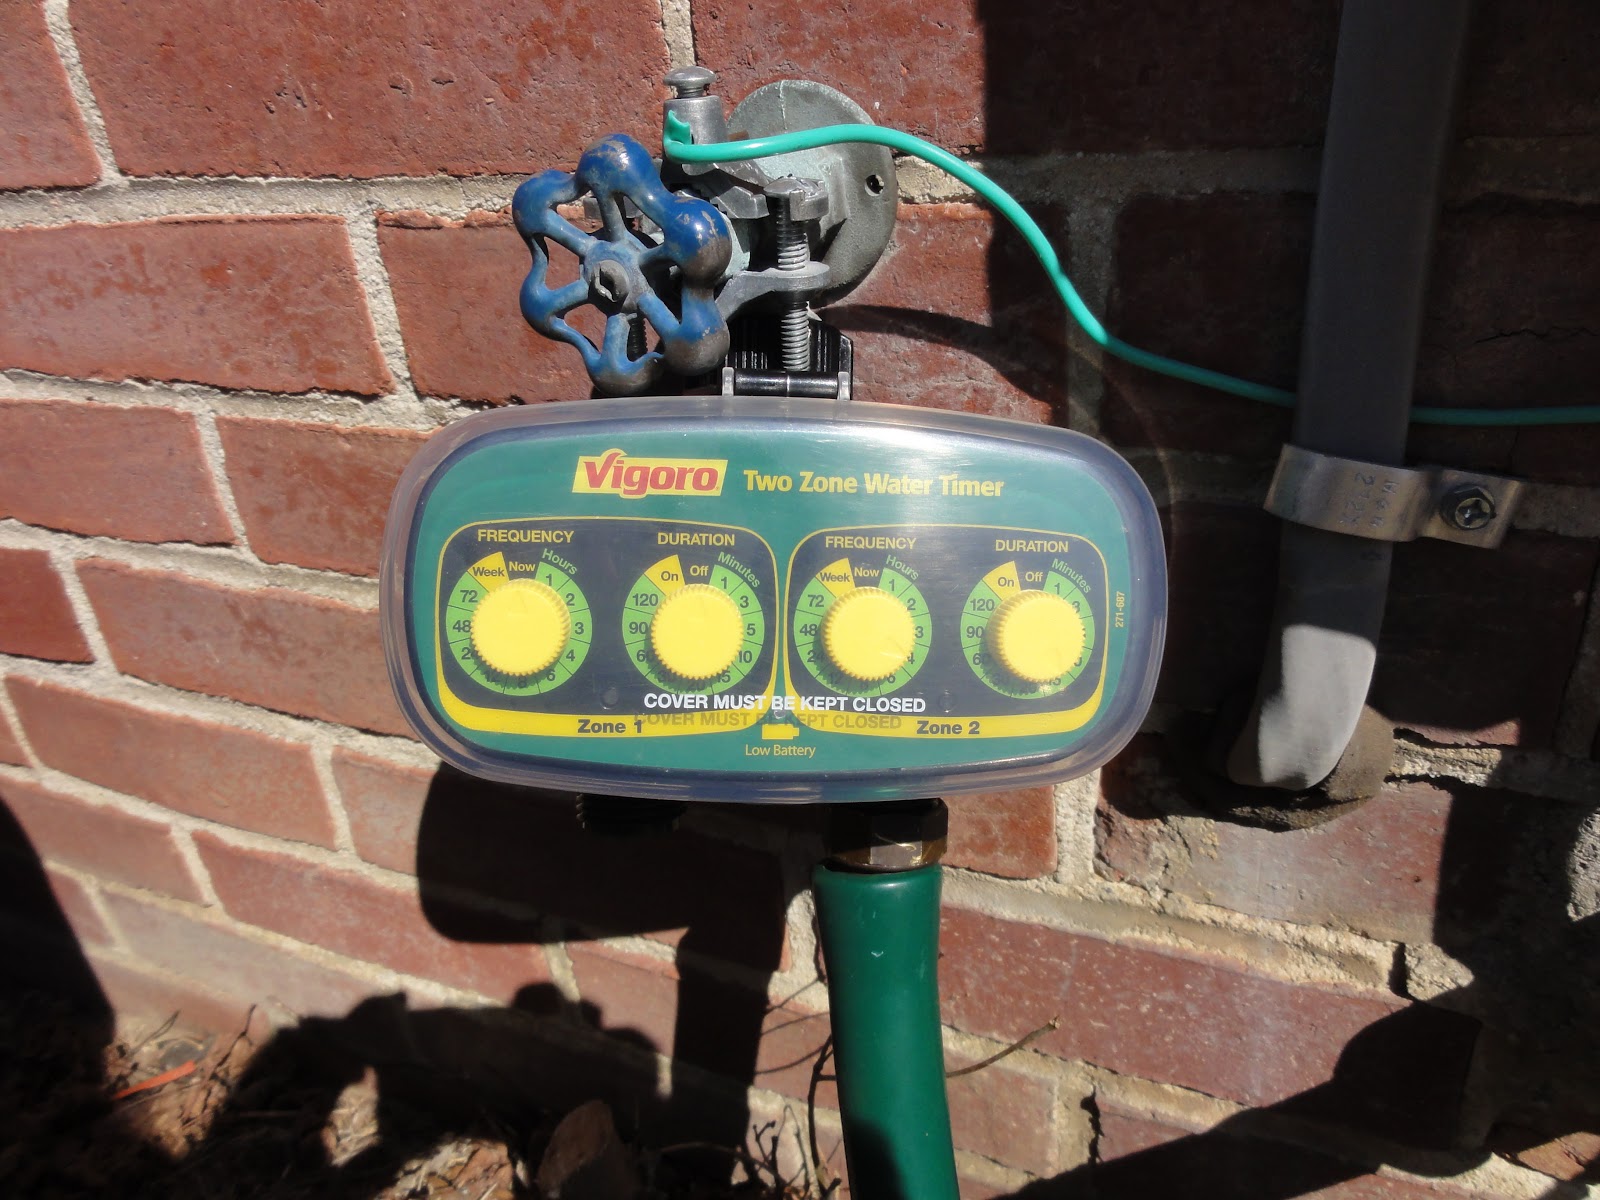
| Hose-timer: A potential big money saver |
I splurged this year on a hose-timer to automate the watering of the garden. Last year I tried to remember to turn on the water when I got home from work each day, and far to often I would forget to turn it off again. The water bill got out of hand, to the tune of over $100 a month, and most of the water was wasted running out the bottom of the bales and taking nutrients with it. This model of timer cost $28 at Home Depot and seems to work well. For bale-prep I currently have it set to run for 15 minutes 4 times per day. I may have to take it off if it gets to cold out at night; freezing will damage it. Be sure to read the directions.
 |
| The soaker-hose getting revved-up |
 |
| Final lay-out of Straw Bale Garden 2012 |
Once I had the hoses set up I tested out the watering system before the final stake-down. I noticed that one of the hoses didn't leech water well from the first 1/3 of its length, so I changed the order of the hoses so that that stretch of hose wouldn't be in an area needing watering (between the last bed of bales and the area from the 2011 garden). Again, this type of preparedness will help avoid headaches later on when the plants are in place. So now the garden is ready to go, the bales just need to cook and I will be adding high-nitrogen fertilizer after about 2-3 weeks of soaking to speed the effect of the composting process.
 |
| Wonderful soil resulting from the composting of 2011 bales |
The plan going forward is to start my seedlings at about the beginning of April, so that the seedlings will be ready for planting in early May. Spring greens will be planted directly into bales about the middle of April and other crops like string beans will be planted directly into bales at about the beginning of May. Large seedlings of some tomato varieties will be purchased from a nursery in May as well, and planted into the enriched soil left over from the 2011 garden (see right). Hopefully everything will go smoothly and this year's garden will be the best yet. Now go get your hands dirty, it is time to get busy!

Wow, I'm impressed. We have some very bad patches of red dirt here in SC and this would be a great way to garden where the soil is washed away.
ReplyDeleteYa. The best part is the soil that is created, like in that last picture. Glad you like the blog.
Delete